
Insert arrows into images: mark screenshots and photos directly in WordPress
You are writing a guide in WordPress and want to point exactly to the button on a screenshot that readers should click. Or you want to mark a detail in a photo without downloading the image and opening another program. With neo Draw you can insert arrows into images directly in the WordPress backend.
The arrow remains its own element. You can move, rotate, scale, recolor or remove it later. This is useful for content editors and support teams who regularly need to adapt WordPress screenshots to new interfaces.
The guide shows the process for an existing JPG or PNG. Lines, circles, text and red frames in the image work in the same editor.
Quick overview
- Download neo Draw for free, install and activate it.
- Select an image in Gutenberg, Bricks, Elementor or the WordPress media library.
- Open the image using the neoDraw button.
- Choose the arrow tool and draw the arrow.
- Adjust color, line width, opacity and position.
- Save the editable SVG drawing or export as PNG.
Install neo Draw for free and activate it in WordPress
Download neo Draw for free from the neoWP download page. Then in the WordPress backend open Plugins > Add New > Upload Plugin, choose the ZIP file and activate the plugin.
After activation neo Draw appears on supported image elements and in the media library. If you want to try the editor before installing, open the browser demo. The free version is sufficient for adding an arrow to an existing screenshot.
Insert an arrow into an image: the quick way in WordPress
Select your image in the post or media library, open neo Draw and draw the arrow. The arrowhead should point exactly at the target, not roughly beside it. Then adjust the color to match the background and save the new version.
In the example a red arrow in the WordPress backend points to Media > Library. The visible neoDraw toolbar also contains shapes, lines, text and the tool to insert additional images.
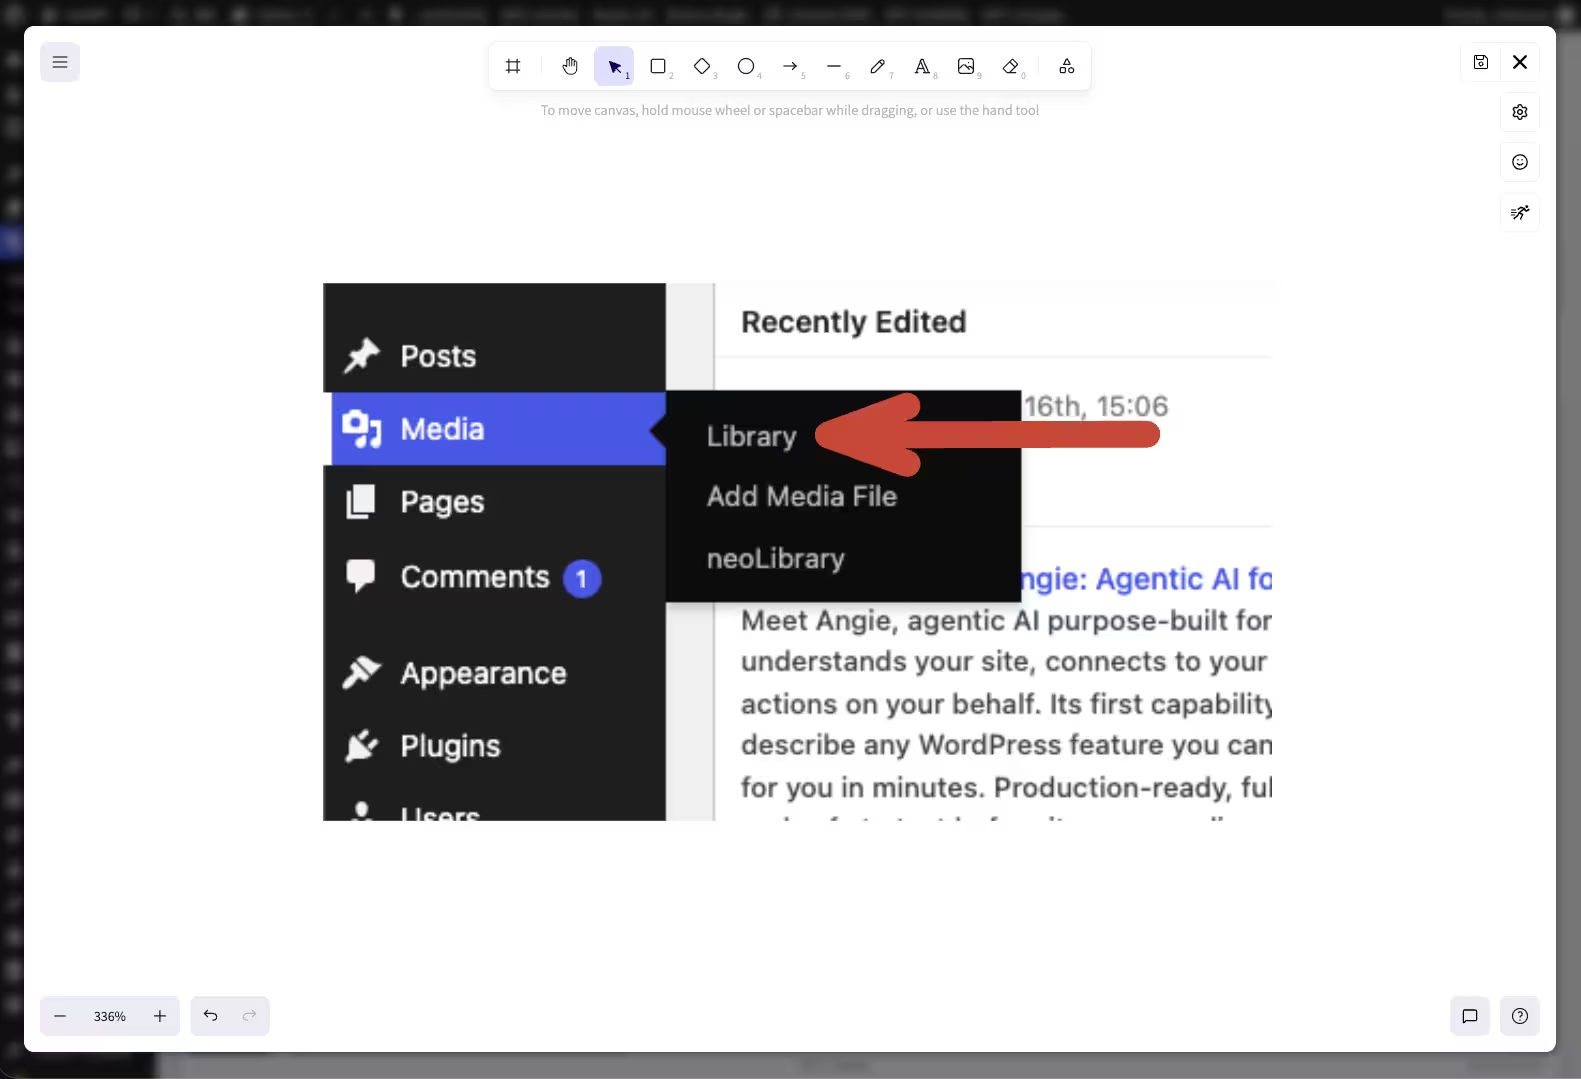
The arrow exists as a separate element over the screenshot. That lets you move, rotate, scale or recolor it later without rebuilding the embedded WordPress image.
How to draw arrows on images
1. Select the image in WordPress
Open the post or page with the image. In Gutenberg click the image block or in Bricks or Elementor select the image element. You can also start under Media > Library and open an existing photo or screenshot there.
For small labels and thin arrows the source image should not already be heavily downscaled. Use the large version from the media library when possible. WordPress centrally manages uploaded images in the Media Library, so you will find the marked version later.
2. Open the image in the neoDraw editor
Open neo Draw using the button on the selected image. From an existing JPG or PNG a new SVG drawing is created, into which neo Draw embeds the source image. The original file remains in the WordPress media library.
So you are editing a new version. This is helpful if you want to use the same photo once clean and once with an arrow, text or frame.
3. Choose the arrow tool and insert an arrow
Click the arrow icon at the top of the toolbar. Place the start point in a quiet area of the image, hold the mouse button and drag to the detail you want to point to. The arrowhead sits at the target position.
Leave a little space between the arrowhead and the target. An arrow that covers a button or text makes reading harder. If the direction is wrong, select the arrow and rotate or move it.
4. Style the arrow and align it to the target
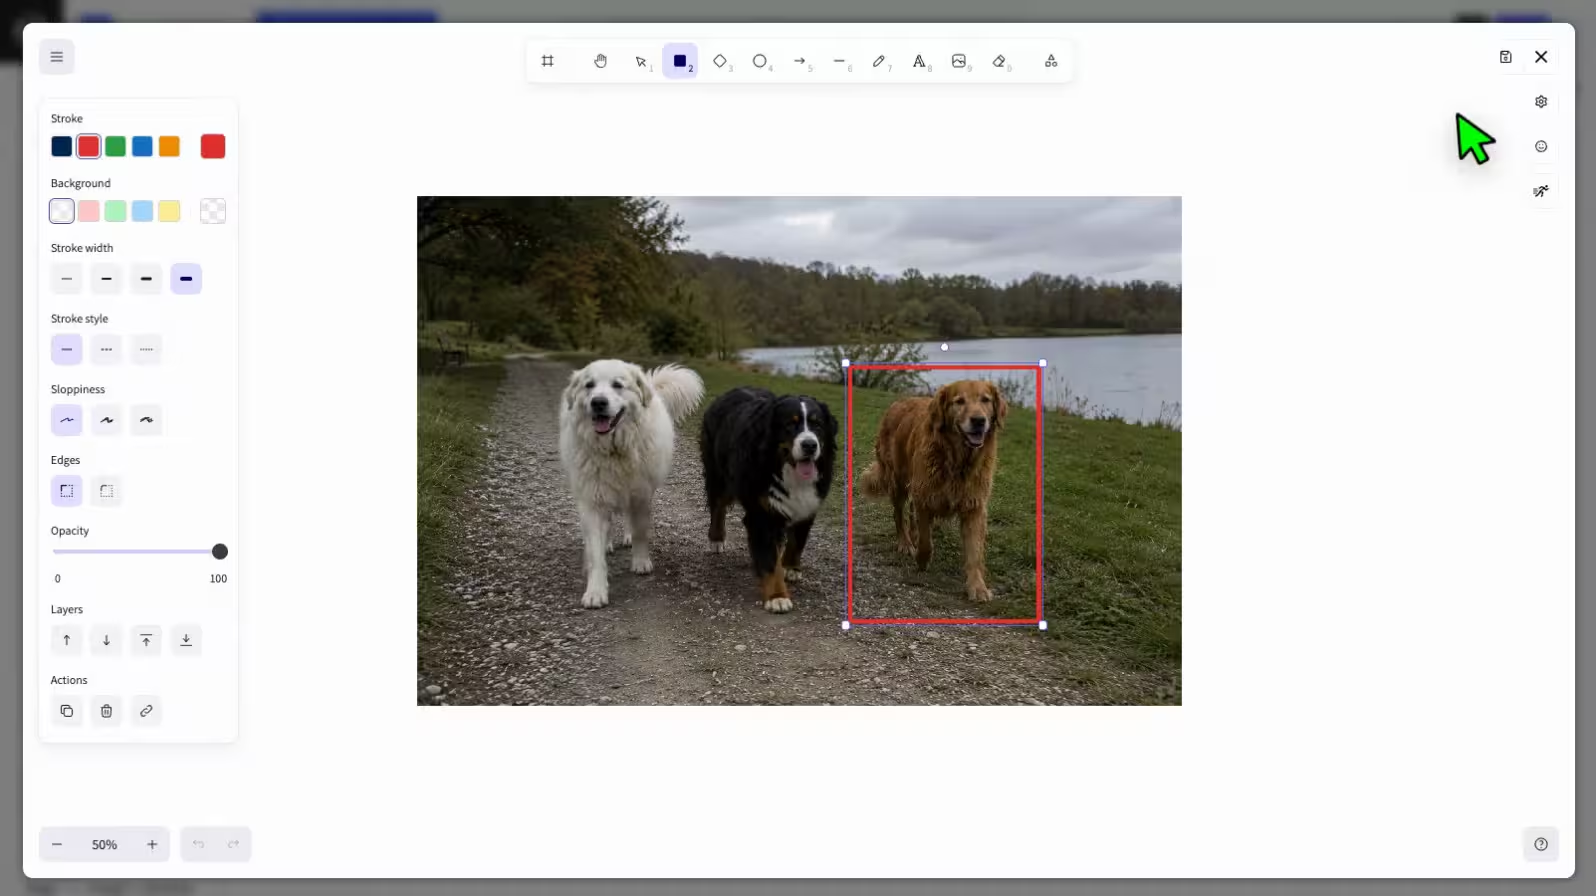
Choose a stroke color that contrasts clearly with the image. Red often works for light screenshots. Yellow or white works better on dark areas. Use Stroke width to set the line thickness and Opacity to set the opacity.
Check the arrow at a lower zoom level. On the large canvas a thin line can look fine but may almost disappear in the published blog post. Usually a clear arrow works better than multiple markings competing for attention.
5. Save or export the image with the arrow
Save the drawing in the WordPress media library. WordPress treats the SVG file like an image so you can insert it into posts, pages and page builders. The editor data remains in the file and allows later edits.
For a local copy you can also export the drawing as SVG or PNG. SVG is suitable for further editing and sharp display at different sizes. PNG is suitable if you want to pass a flat pixel graphic to another program.
Move, rotate and recolor arrows later
An arrow that was rendered directly into a PNG file can no longer be selected individually later. You would have to re-edit the relevant image area or recreate the screenshot.
In neo Draw the arrow remains its own element. You can click it, move it to another place, extend it, rotate it or change its color. Text, lines, circles and frames also remain separate. This saves work if the position of a button shifts after a WordPress update.
Drawing arrows on images: color, style and export
neo Draw has tools for arrows, straight lines, rectangles, circles, freehand drawings and text. For the arrow you can adjust color, stroke width, stroke style, opacity, position and size. The elements can also be placed on different layers.
Use an arrow for a precise target. A red frame in the image fits better when a whole area belongs together. Text is worthwhile only if the caption alone does not explain what the marking indicates.

In the export dialog you decide whether to download the marked graphic as PNG or SVG. The SVG version stored in WordPress is the right basis if the arrow and caption should be edited later.

Mark a screenshot with an arrow: clear but not overloaded
In a support screenshot the reader should find the searched button in seconds. Therefore place the arrowhead close to the target and start the arrow in a free area. Two arrows make sense when a sequence must be shown. One is enough for a single target.
Check the graphic at the width at which it will later appear on the website. On the smartphone screenshot and arrow shrink together. A stronger line and a calm background help more than an especially large arrow.
The alt text should convey the information the arrow communicates. The W3C guidance for informative images recommends capturing the meaning rather than a purely literal image description. So write something like WordPress image block with neoDraw button highlighted rather than Screenshot with red arrow. You can find more examples in the article about good alt texts for images.
Insert arrow into JPG, PNG, or photo: what gets saved?
You can open an existing JPG or PNG from the WordPress media library in neo Draw. The source image becomes part of a new SVG drawing. The arrow, text, and other shapes are separate elements layered over the image.
The original remains unchanged. You can therefore use the same shot elsewhere without the marking. The new SVG file can be inserted like a normal image. If you need a raster graphic outside WordPress, export the result as a PNG.
For a photo with many details, SVG is still useful: the photo remains embedded while the arrow is a crisp drawn element on top. When scaling, its outline stays clean.
Arrows in Gutenberg, Elementor, Bricks, and the media library
neo Draw integrates directly into Gutenberg, Elementor, Bricks, and the Classic Editor. There you open image editing on the selected image element. In other page builders you select the finished SVG graphic via the normal WordPress media library.
The drawing is not tied to the editor it was created in. A screenshot annotated in Gutenberg can later be used in Elementor and edited again via the media library.
Draw arrows on images: short alternatives to neo Draw
For a single local screenshot, the Windows Snipping Tool or the macOS Preview markup tools are often enough. Canva is suitable if you build a complete social media layout outside WordPress. GIMP and Photoshop are appropriate if you want to do extensive pixel-level retouching of the image.
neo Draw is intended for cases where the image already belongs to your WordPress site. You open it there, add the arrow, and save the editable version back to the same media library. The back-and-forth between download folder, image program, and WordPress is eliminated.
Frequently asked questions about arrows in WordPress images
How do I add an arrow to an image in WordPress?
Install neo Draw, choose the image in the media library or page builder, and open the neoDraw editor. Use the arrow tool to drag the arrow from the start point to the desired spot and then save the drawing back to WordPress.
Can I draw arrows on images with neo Draw for free?
Yes. Arrows, lines, shapes, text, and painting on existing images are part of neo Draw and can be used with the free version. The download is available via the neoWP download page.
Can I move or recolor an arrow later?
Yes. neo Draw saves the arrow as its own element in the SVG drawing. You can later select it, move it, scale it, rotate it, recolor it, or change its stroke width and opacity.
Does the original JPG or PNG remain preserved?
Yes. When opening an existing JPG or PNG, neo Draw creates a new SVG drawing with the embedded source image. The original image file remains in the WordPress media library.
Can I export the image with an arrow as PNG or SVG?
Yes. The drawing can be exported as SVG or PNG. For further editing in neo Draw the SVG version makes sense because it contains the individual drawing elements and editor data.
Does neo Draw work with Gutenberg Elementor and Bricks?
Yes. neo Draw is integrated directly into Gutenberg Elementor Bricks and the Classic Editor. You can also select a drawing via the normal WordPress media library and use it in other page builders.
What color is suitable for an arrow in a screenshot?
The arrow color needs a strong contrast with the background. Red works on many light green or blue surfaces. On dark images yellow or white are often more legible. Also check the arrow at the final display size.
What belongs in the alt text of an image with an arrow?
Describe the information the arrow is pointing to instead of just naming the color or shape of the arrow. A suitable alt text would be for example WordPress image block with highlighted neoDraw button.
Insert arrows into WordPress images and start for free
For an arrow in the screenshot you do not need to leave WordPress. Select the image open neo Draw and place the arrow tip where you want readers to look. Adjust color and line weight to the final display size.
The new version lands in the media library and remains editable. Download neo Draw for free or open the demo first with a sample image.

